Ratios and Gels
This tutorial starts off with a demonstration comparing the shadows created when varying the intensity between the main and the fill lights. Using a Sekonic incident light meter with the dome retracted (an L-358), so I could measure two light sources independently of each other, the tutorial illustrates the difference in shadows created by a 5 f-stop range of intensities. Because ratios are measured in multiples of two (just like f-stops and shutter speeds work), a 1:1 ratio means the two lights are equal in power, a 2:1 ratio means the main light (also often called the “key” light or the “primary” light) is twice as powerful as the fill light, a 3:1 ratio means the main light is four times as powerful as the fill light, a 4:1 ratio means the main light is eight times as powerful as the fill light, and a 5:1 ratio means the main light is sixteen times as powerful as the fill light. By comparing the darkness of the shadows created by these different ratios a photographer can get to know just how big the difference between them appears and can learn to pre-visualize what the resulting image will look like. From a 1:1 ratio, which makes the subject look flat and overly lit, to a 5:1 ratio, which creates inky black shadows with no detail in them, or at any ratio in-between the two extremes, knowing just how dark the shadows will appear results in the photographer being able to control just how much drama his or her lighting will create and make choices with that thought in mind.
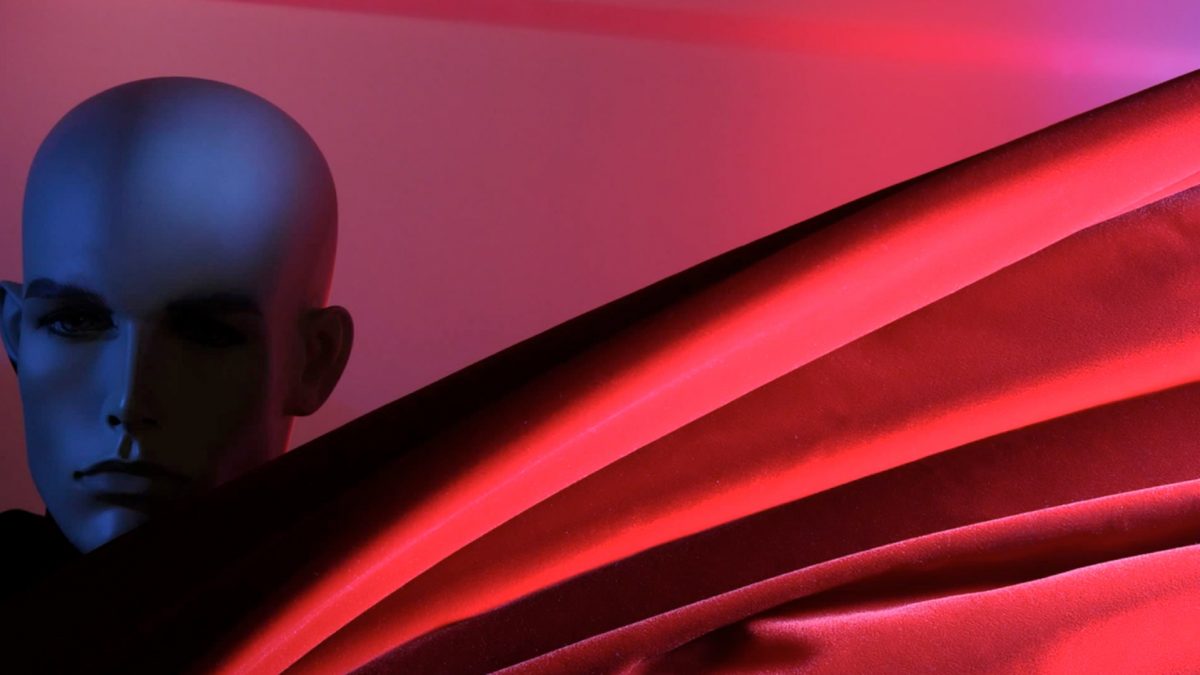
For the second part of this tutorial, intensifying colors, I ran into a creative wall. I was trying to show how a colored light shining on a colored background could intensify or even change the color of the background. The original idea was to photograph a piece of yellow paper lit with a light that was covered with a red gel filter to show how the paper looked orange. Next I was going to repeat the process using the same red gelled light but for the second example I was going to change the paper from yellow to blue. In the second demo, the blue paper lit with the same red light would look purple. While both results were as I expected the images didn’t look as dramatic as I wanted; basically I ended up with an image of an orange paper and a purple paper. The whole scenario became so frustrating I shut down the set and went for a drive to clear my head and refine my concept.
The ride lasted about 40 minutes and my decisions made during it were as follows:
- I decided I was going to break every rule about balancing light sources I knew in the search for intensifying color and even break rules that had to do with color balance
- I decided to create a new set using a piece of red velvet draped in front of a diffusion frame and a manikin head peaking out from between the two.
- I decided to shoot the picture vertically (so gravity would help me keep the folds in the draped velvet where I wanted them), but even though the image was shot vertically, I would present the final image horizontally.
- I decided I would first shoot the image with a single “white” bounce light so viewers could compare whether or not I had intensified the colors in the second rendition of the same image.
- I decided I was going to wipe a red gelled light across the velvet folds from the right and wipe a blue gelled light across the velvet folds from the left to better illustrate the intensified color of the red light on red velvet effect.
- Finally, I decided to set my camera’s white balance to about 3200 degrees Kelvin even though I was using electronic flash (which is approximately 5600K). Doing this would both intensify the reds in the image and make the blue-gelled light appear even more intensely blue.
Whether you like the straight, white light rendition or the intensified color rendition is entirely up to you but personally, I find that by breaking a few rules the final, intensified color image became much more dramatic and exciting.
Set Shop Tutorial Checklist
Call (800) 422-7381 or visit us online to purchase any of the products used in this tutorial.
- Rosco Gels & Rolls: Rosco Gels and Rolls, come in sizes: 20″ X 24″; 24″ X 25′; 48″ X 25′.
- Lee Filters and Gels: The SetShop carries the full line of Lee Filters and Gels.
- Professional Gaffers Tape: All of the SetShop’s professional gaffer tape comes from Shuretape formerly known as Permacel.
- Clamps & Gripheads: The SetShop carries a wide assortment of clamps and gripheads.
- Tough Lux 60″x15′ Roll Diffusion: Tough Lux has been the industry standard for years. It is a neutral, heat stable diffusion material. It offers the perfect level of diffusion for most applications.
- Sandbags & Rigging Accessories: The SetShop stocks an assortment of sandbag shapes and sizes as well as any other rigging material you may need.
- Light Stand: Set Shop has a variety of stands and equipment for backgrounds and lights.

Steve Sint

Steve Sint


